Meet Git
Overview and preparations
Let’s go through the basics of using Git. Before working on this tutorial, please go and accept exercise 2 on GitHub Classroom from the Exercise-2 landing page. Also, open a JupyterLab session in order follow this tutorial hands-on. You can find instructions for using Binder and CSC Notebooks in Lesson 1 materials.
This tutorial covers the very basics of version control using Git and GitHub. The idea is that you would use this workflow each week when working with the exercises:
- Configuration
- Clone a repository from GitHub
- Add changes to the staging area
- Commit changes
- Publish your local commits to GitHub
There are many different ways to use Git. We will first go trough the basics of using Git from the command line, and then we will learn to repeat these steps using a plugin in JupyterLab. These materials have been adapted for the geo-python course from GitHubClassroom Campus Advisors -resources, and Git documentation.
Note
After going trough this tutorial, you will be familiar with the following git-commands:
- git clone [url] - retrieve a repository from a remote location (often from GitHub)
- git status - review the status of your repository (use this command often!)
- git add [file] - add files to the next commit (add files to the staging area)
- git commit -m “[descriptive message]” - commit staged files as a new snapshot
- git pull - bring the local branch up to date (fetch and merge changes from the remote)
- git push - transmit local branch commits to the remote repository
Check out other commonly used git commands from the GIT CHEAT SHEET
Key concepts and tools
We use Git to record changes to our files over time. Version control history consists of snapshots of all the files in our project.
In order to create a snapshot, we first add content to the staging area (using git add). The idea is, that you can have a (sometimes messy) working directory, and by using git add you tell
Git which files to include in the next committed snapshot. Finally, git commit records a permanent snapshot of the staged changes. Read more about basic snapshotting in here.
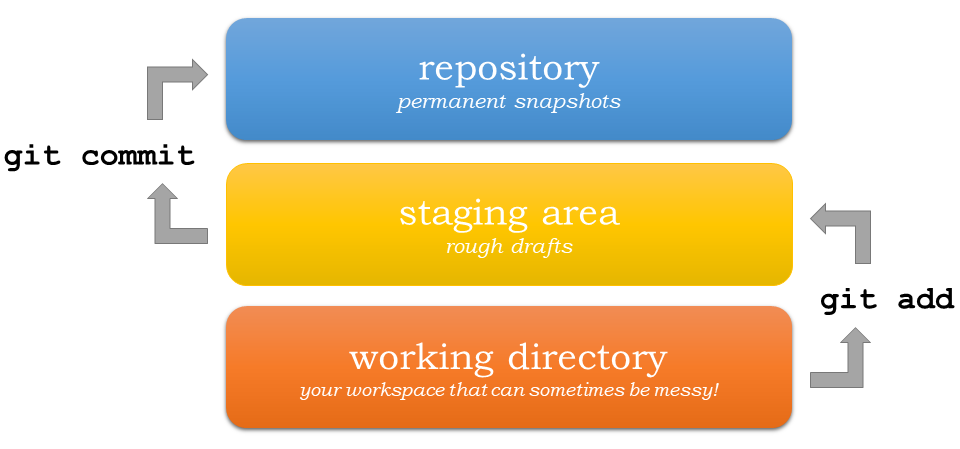
Version control steps using Git (adapted from Git documentation).
When you are ready to share your work on GitHub, you need to communicate between the local repository and the remote repository over the network. Use git pull to fetch and merge changes from a remote repository,
and git push to update local changes to the remote. Read more about sharing and updating Git projects in here.
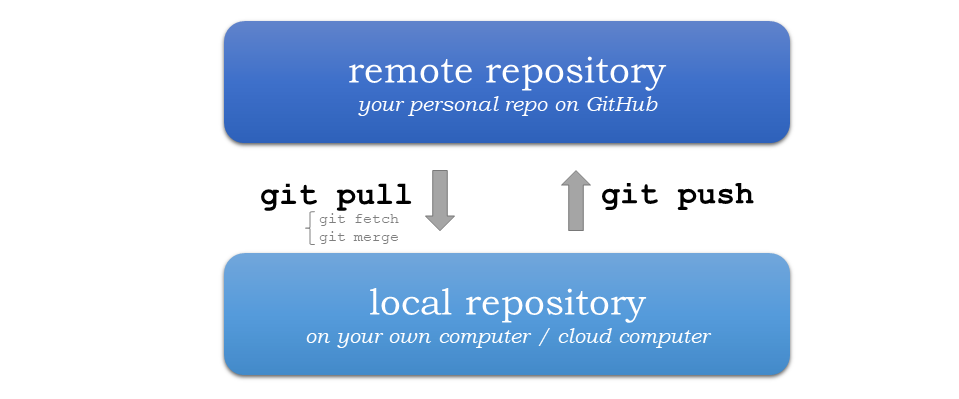
Update your Git project using the pull and push commands. Always pull before you push (especially when working in a shared project)!
Using Git from the command line
You will need to know a couple of basic command line commands in order to use Git. Code Academy’s list of command line commands provides a good overview of commonly used commands for navigating trough files in the Terminal. The instructions below are compatible with the Linux terminal (which is available in the course environment).
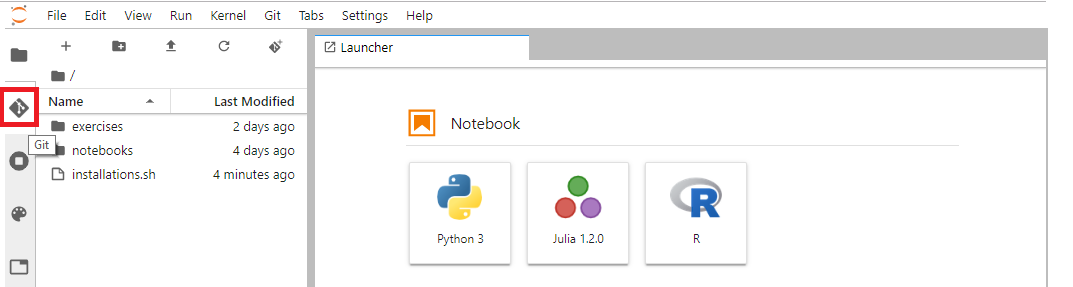
Start a new Terminal session in JupyterLab using the icon on the Launcher, or from File > New > Terminal.
check if you have git installed by typing git --version in the terminal window:
$ git --version
Anything above version 2 is just fine.
Configuration
It is possible to customize Git to work exactly the way you need it to by specifying configuration settings using the git config command.
For our purposes, it is enough to customize Git to remember our identity. Let’s set up our name and email address in the configuration settings:
$ git config --global user.name "[firstname lastname]"

$ git config --global user.email "[email@example.com]"
You can check existing user information with these commands:
$ git config user.name

$ git config user.email
Git will sometimes ask you for username and password in order to perform operations such as pushing and pulling. We can tell Git to remember our GitHub username and password to avoid typing them in all the time (see instructions for other operating systems than linux here):
$ git config --global credential.helper 'cache --timeout=3600'
The --timeout parameter specifies the time Git remembers our credentials in seconds.
Note
You will need to cache your credentials when using the JupyterLab Git plugin.
Clone a repository from GitHub
We will clone an existing repository from GitHub and start modifying it. A repository, or “Git project”, or a “repo”, is a location for storing files. A repo contains all the files and folders associated with a project and the revision history of each entity. In general, it is recommended that each project, library or discrete piece of software should have it’s own repository. In this course each exercise has it’s own repository.
First we need to navigate to the correct folder in the Terminal. Type in ls to check the contents of the current directory:
$ ls
In case you are working in the CSC notebooks environment, you should see two directories (folders) in the work-directory: exercises and notebooks.
The notebooks folder contains all the lesson materials (each time you launch an instance, Git automatically pulls changes from https://github.com/geo-python/notebooks! ).
The exercises folder is an empty folder where you can start working with the exercise materials.
Let’s change directory to the exercise directory using the cd command:
$ cd exercises
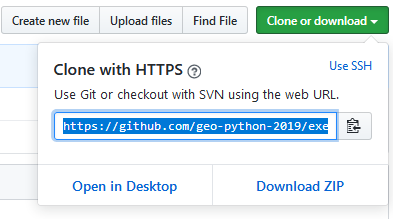
Now we are ready to start cloning. For this, we need a url for the remote repository. Go to https://github.com/geo-python-2019/ and navigate to your personal Exercise-2 folder. For example, Vuokko would go to https://github.com/geo-python-2019/exercise-2-VuokkoH.
On GitHub, find the button Clone and download and copy the url under Clone with HTTPS.
Clone the repository into JupyterLab using the git clone command:
$ git clone [paste your URL here]
for instance:
$ git clone https://github.com/geo-python-2019/exercise-2-VuokkoH.git
Note
You can paste text on the terminal using Ctrl + V or Shift + Right Click --> paste
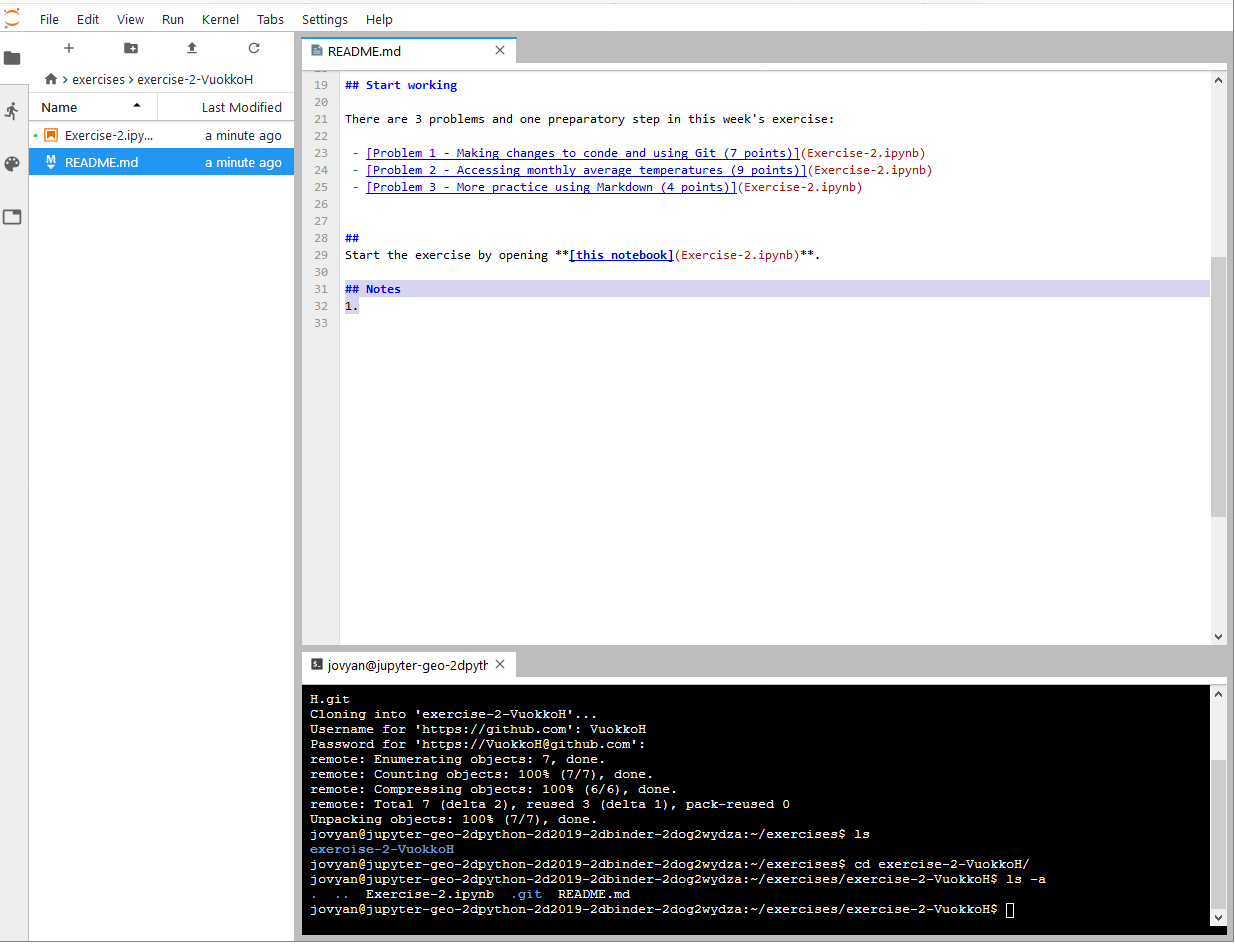
After running git clone Git will prompt you for GitHub username and password:
Cloning into 'exercise-2-VuokkoH'...
Username for 'https://github.com': VuokkoH
Password for 'https://VuokkoH@github.com':
remote: Enumerating objects: 4, done.
remote: Counting objects: 100% (4/4), done.
remote: Compressing objects: 100% (4/4), done.
remote: Total 4 (delta 1), reused 0 (delta 0), pack-reused 0
Unpacking objects: 100% (4/4), done.
Once cloning is completed, check what happened in the current directory by listing directory contents in the terminal using the ls command:
$ ls
You should now see the exercise repository listed in the terminal (as well as in the File Browser).
Navigate to the exercise directory using the cd command:
$ cd exercise-2-username
List all files in the directory, this time including all hidden files using the ls -a (on Windows, use dir /a):
$ ls -a
Tada! You now have a local version of your exercise-2 repository! You should see .git listed on the screen - this is a hidden folder that contains all the information that Git needs for version control.
Check the status of your local git repository usin the git status command, which provides change information about the repository.
$ git status

On branch master
Your branch is up to date with 'origin/master'.
git status is the most common git command - use it often!
As we didn’t make any changes yet, git should tell that the project is up to date.
Note
Git status also tells that you are on branch master. During this course you don’t have to worry much about branches, but it is good to know that master branch is always the default branch. A branch is a parallel version of a repository which can be developed separately before merging the changes to the primary version. You can read more about branches here.
Note
In case you would start a new project from the scratch, you could create a new repository using git init command (https://git-scm.com/docs/git-init).
During this course, however, we always start working by cloning an existing repository.
Add changes to the staging area
Let’s start making changes in the repository! For example, open the Readme.md -file of the exercise repository and type in something.
Exercise 2 Jupyter Notebook and the terminal window in JupyetLab. Drag and drop the windows to reorder them.
After saving your changes, check the status of the repository:
$ git status
Git should tell you that it detected changes that have not been “staged for commit:”
On branch master
Your branch is up to date with 'origin/master'.

Changes not staged for commit:
  (use "git add <file>..." to update what will be committed)
  (use "git checkout -- <file>..." to discard changes in working directory)

        modified:   README.md
As you can see, you could use git checkout README.md to discard the changes you made.
In case you are happy with your changes, go ahead and run git add README.md to add the changes to the staging area:
$ git add README.md
check the status of your repository:
$ git status
Git now tells you that there are changes that are ready to be committed:
On branch master
Your branch is up to date with 'origin/master'.

Changes to be committed:
  (use "git reset HEAD <file>..." to unstage)

        modified:   README.md
Note
Here, git tells you how you can unstage the changes using git reset HEAD <file>.... Doing this would not revert the changes, just unstage them back to the working directory.
You might want to “reset HEAD”, for example, in case you had added many files to the staging area, but decide to commit them separately. For now, we are happy with the changes made,
and are ready to commit them.
For now, we are happy with the changes made, and are ready to commit them.
Commit changes
Before recording your changes, check again the status of your repository:
$ git status
All files listed under “Changes to be committed” will be included in the next commit - a record changes to the repository.
Commit the changes using git commit -m [message]. Remember to write a descriptive commit message!
$ git commit -m "added notes"
Check the status:
$ git status
Git status tells that your branch is ahead of the remote repository’s master branch by 1 commit, and tells you to use git push to publish the local changes:
$ git status
On branch master
Your branch is ahead of 'origin/master' by 1 commit.
  (use "git push" to publish your local commits)
Publish your local commits to GitHub
Next, we want to synchronize our local changes with the remote repository on GitHub. First, it’s good to use git pull to double check for remote changes before contributing your own changes.
$ git pull
Git should tell you that the repository is “Already up-to-date” (unless you have changed something on GitHub in the meanwhile!).
Now we are ready to push the local changes to GitHub using git push:
$ git push origin master
or just simply
$ git push
Unless you cached your credentials, Git will once more prompt you for username and password before pushing the changes online:
jovyan@pb-bianca-the-green-1-9bv5n:~/work/exercises/exercise-2-VuokkoH$ git push
Username for 'https://github.com': VuokkoH
Password for 'https://VuokkoH@github.com':
Counting objects: 3, done.
Delta compression using up to 80 threads.
Compressing objects: 100% (3/3), done.
Writing objects: 100% (3/3), 328 bytes | 164.00 KiB/s, done.
Total 3 (delta 1), reused 0 (delta 0)
remote: Resolving deltas: 100% (1/1), completed with 1 local object.
To https://github.com/geo-python-2019/exercise-2-VuokkoH.git
   3853103..526ea9a  master -> master
Check once more the status of your repository:
$ git status
Now you should see the updates in GitHub! Go and have a look at your personal repository in https://github.com/Geo-Python-2019/ .
Note
Remote repositories are versions of your project that are hosted on a network location (such as GitHub).
When we cloned the repository using git clone, Git automatically started tracking the remote repository from where we cloned the project.
You can use the git remote -v command to double check which remote your repository is tracking:
$ git remote -v
You can read more about managing remotes in here.
Using the JupyterLab Git plugin
For your convenience, we have also installed a plugin in JupyterLab which has buttons for completing most of the version control tasks we need during this course.
Preparations in the Terminal
When using the plugin, you first need to cache your username and password, and clone the repository on the command line.
$ git config --global credential.helper 'cache --timeout=3600'
Navigate to the exercise directory (if you are not already there):
$ cd exercises
$ git clone [paste your URL here]
After caching the credentials and cloning the repo, you can do the rest using the plugin.
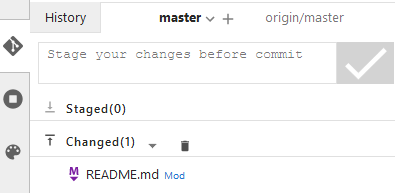
Stage changes in the plugin
- Make changes in the README.md file (or any other file in the repository). The Git plugin should detect the changes once you have saved the file:
- Stage the changes using the arrow-button:
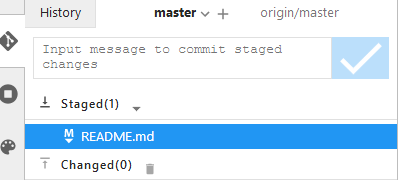
Commit changes in the plugin
- Add a descriptive commit message in the text box and click on the commit-button:
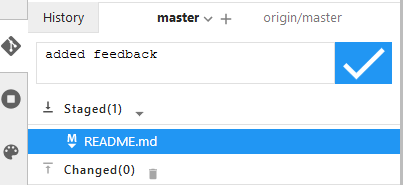
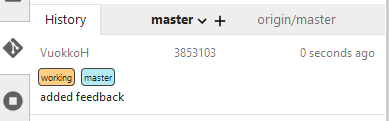
- Check commit history under the history-tab:
Pull and push using the plugin
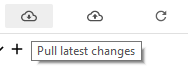
- First, press “Pull” to check that the local repo is up to date:

Once the Pull succeeded, you can click “Dismiss”.
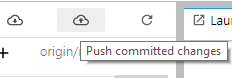
- Then, press “Push”
Once the Push succeeded, you can click “Dismiss”.
Warning
In case you get this error message when pushing or pulling: fatal: could not read Username for 'https://github.com': terminal prompts disabled, you have not successfully cached your credentials.
Try caching your credentials again, and run git pull and git push from the command line.
If everything else fails…
Remember that you can always download your files on your own computer, and upload them manually to GitHub like we did in exercise 1!

Source: https://xkcd.com/1597/
That’s all you need to know about Git for know :)