Using the cloud computing environment
We’ll start using the cloud computing environment by creating and activating your account on the Computing Dashboard, and launching our first Computer Instance. Then we will download course materials from GitHub to your cloud computer, do some work, and save your work back on GitHub.
Note
The first time you use the computing environment, you must create and activate your account on the Computing Dashboard. You only need to do this once.
Here are the remaining steps that you will follow during each lecture. You will do steps 1-4 below repeatedly during the course, so it will become familiar to you after a few weeks.
- Log into the Computing Dashboard and Launch a new computer instance.
- Connect to the computer instance from your local computer
- Use Git and GitHub to download the course materials and save your work
- When finished working, destroy the Computer Instance
Launch a new computer instance
Launching a new computer instance is a straightforward procedure that is done from the Computing Dashboard. These instructions will help you first launch a new Computer Instance and then open a port to it from your local computer’s IP address (steps 5-6). A port in a computer is a somewhat similar to the idea of having a door in a house: you cannot access the house without having an open door. In this analogy, the default computing instance will have all the doors closed until you open one for yourself.
Step 1
Navigate with a web browser to https://pb.geo.helsinki.fi.
You might want to bookmark this page in your web browser as we are going to this address often.
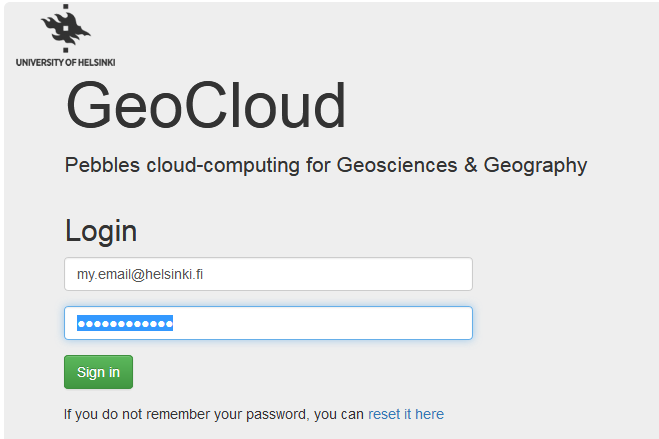
Step 2
Sign in to the Computing Dashboard
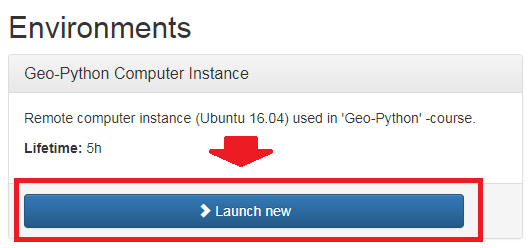
Step 3
Launch new computer instance from the Dashboard tab.
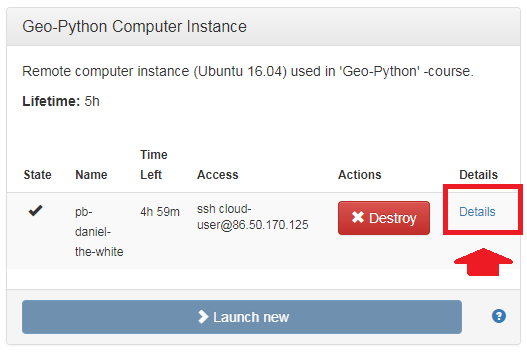
Step 4
Wait until the instance is ready. You will first see a spinning gear under the State, the instance is ready when the gear turns into a checkmark. Now go to instance details.
Step 5
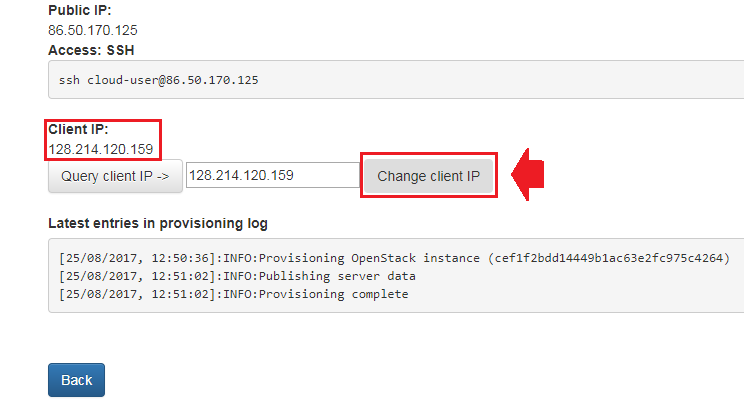
Click on the Query client IP button to find out the IP address of your local computer.
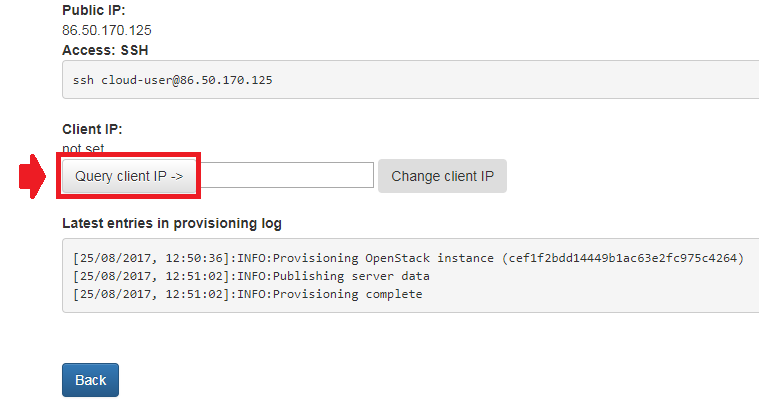
Step 6
Click on the Change client IP button to open a port in the cloud computer for your local computer. When done successfully the IP address should appear under the
Client IP text as shown below.
Step 7
Done! You have a remote computer running that you can access now from your local computer.
Go back to the Dashboard tab by pressing Back button.
Connect to the computer instance
There are basically two steps that you need to do for being able to connect to a remote (cloud) computer instance: (1) Find the IP address of the (running) cloud computer instance and (2) connect to it with remote desktop software on your local computer.
How you connect to the computer instance will depend on
- the operating system that you have on your local computer (Windows / MacOS / Linux)
- The remote desktop software (or protocol) that you are using
Below are instructions how to access the computer instance on different systems (follow the one that you have).
Copy the IP address of your computer instance
Everyone will need to do this.
You can find the IP address from the Computing Dashboard under the ‘Access’ heading. Select and copy only the numbers. We won’t be using the rest of the information mentioned there. That information is used for taking a specific type of connection (SSH) to the computer using the command prompt.
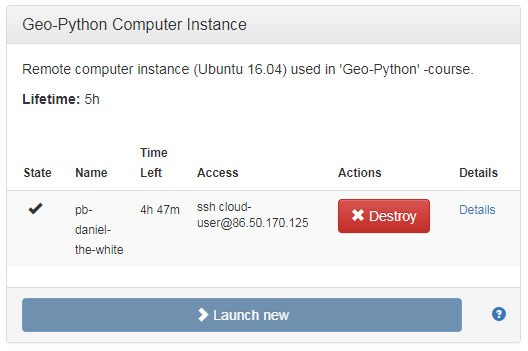
Copy IP address of the computer instance
Connect with Windows
On Windows we use ‘TightVNC Viewer’ to connect to the remote computer. The TightVNC Viewer is freely available and an open source remote desktop software that has good features, and it is smooth to use. TightVNC Viewer can be directly used with the computers in the GIS labs where the software is readily installed.
Hint
You can download and install TightVNC for Windows by running the 64-bit installer (requires admin rights).
- Start the tool by clicking the Windows Start button and searching it with word ‘TightVNC’
- Paste the IP address of your computer instance that you copied in the
previous step and add a port
number
5901after the IP address separated with colon so that it will look likexxx.xxx.xx.xxx:5901
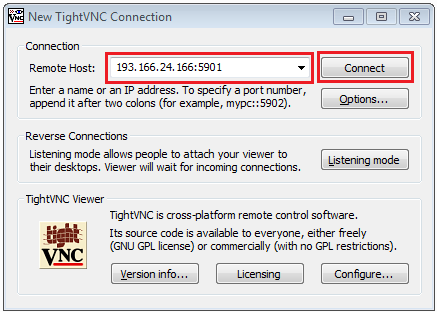
Fill in the IP address
- Fill in the password
geomanand press OK
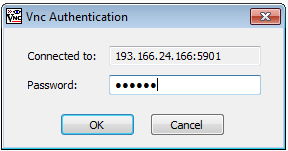
Fill password
- That’s it! You’re inside the remote computer and ready to roll.
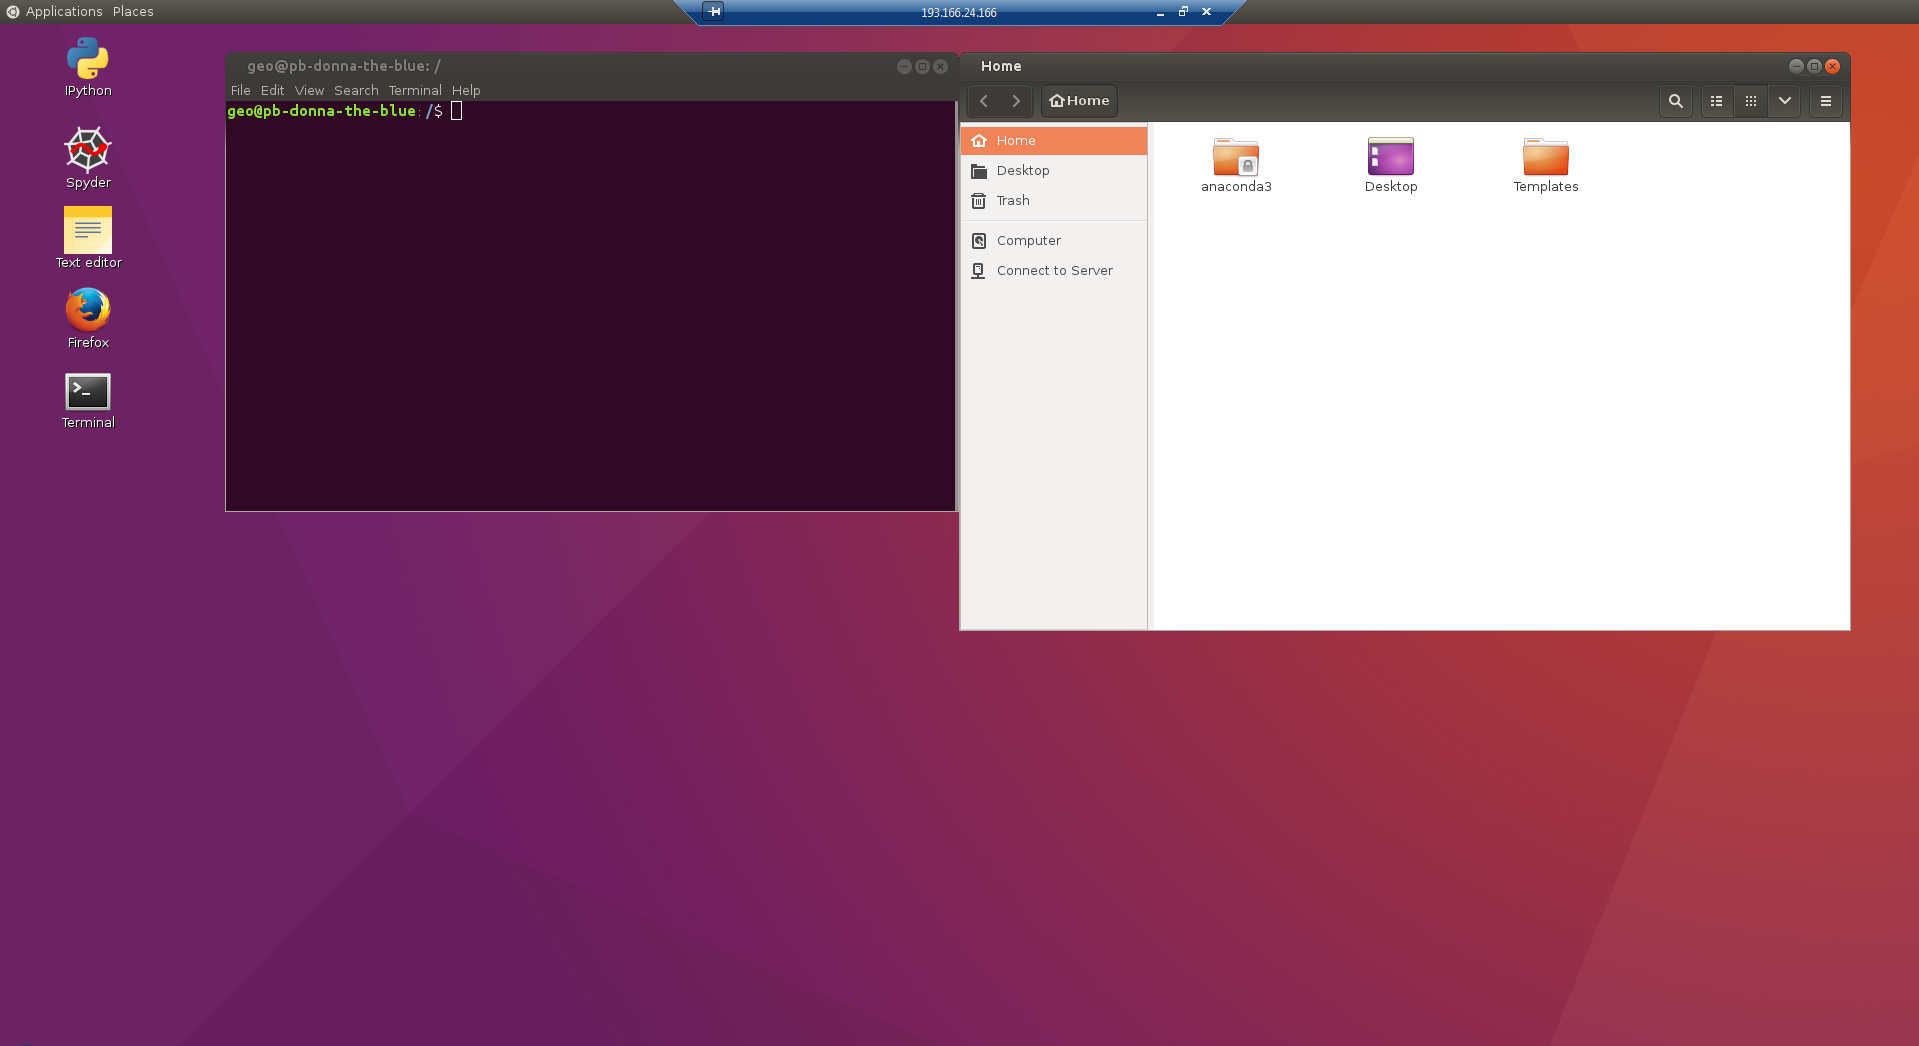
Inside the remote computer
Alternative way to connect from Windows
It is also possible to connect with the remote computer using Remote Desktop Connection tool that comes with every Windows computer (see more details).
Connect with MacOS
1. The preferred way to connect to the computer instances on MacOS is to use the built-in connection tool in Finder.
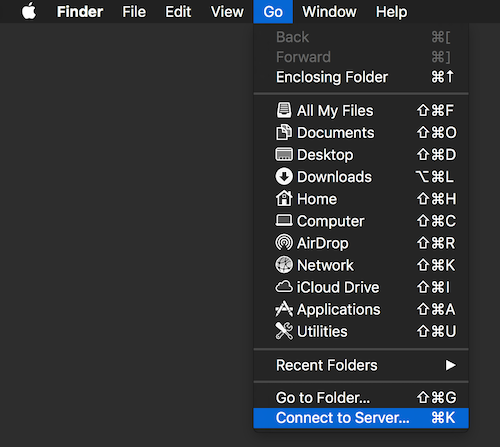
Connect to server
2. Once the Connect to Server window appears, enter the address of the
computer instance to connect in the format
vnc://XXX.XXX.XXX.XXX:5901, replacing the XXX.XXX.XXX.XXX with
the numbers you selected and copied above in the Computing Dashboard.
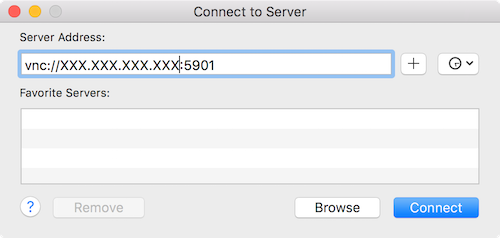
Enter server info
3. At this point you can click Connect and enter the password for the
connection when prompted (geoman). Now you should see the desktop of
your cloud computer!
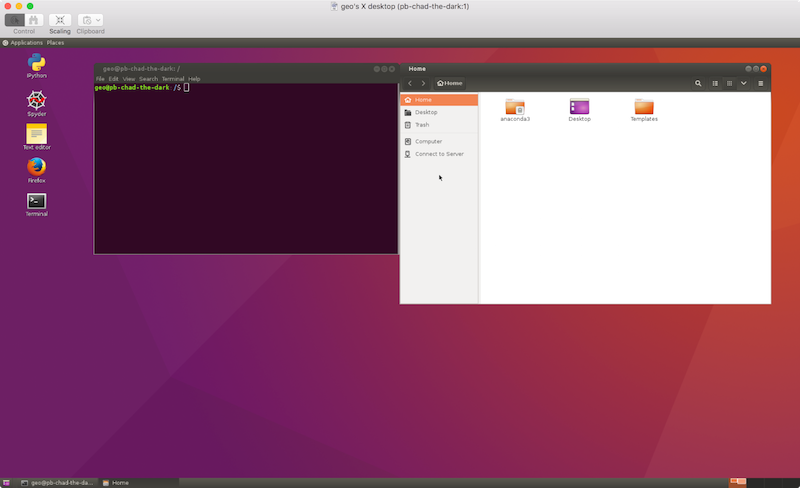
Cloud desktop Mac
Connect with Linux
If there are users running Linux, let us know if you’re not aware of how to use VNC on your machine and we can help get you connected.
Connect with an iPad
- If you do not already have it, you should install a copy of the VNC Viewer - Remote Desktop app.
- Open the VNC Viewer - Remote Desktop app and click on the
+at the upper right corner of the app to add a new connection. - Enter the address of the machine in the format
XXX.XXX.XXX.XXX:5901, replacing theXXX.XXX.XXX.XXXwith the numbers you selected and copied above in the Computing Dashboard. Tap Save. - Tap Connect and enter the password for the connection when prompted (
geoman). Now you should see the desktop of your cloud computer!
Workflow of using the cloud computing environment
- You will launch a new cloud computer instance every time you’re working in a lecture or doing the exercises.
- You will ALWAYS download the course materials from the course GitHub repository for the week.
- You will ALWAYS save everything you have done (codes, figures, data, etc.) on your private GitHub account because files cannot be saved permanently to the cloud computers.
- There is a fixed ‘life-time’ allocated (5 hours) for each computer instance
- After finishing your work, you should always ‘destroy’ your course environment by yourself from the Pebbles Dashboard.
Note
We have tried to design the cloud computers to have reminders to save your work, or that you session will soon end. However, when the life-time of the computer instance is finished the system will automatically ‘destroy’ your Computer Instance and you will lose EVERYTHING in it if you have not updated your files on Github.